
PXLtools — Tool guide
GLB Manager — Maya Import + Export
One tool for moving GLB/glTF assets in and out of Maya. Import parses the geometry, extracts and organises the PBR textures, builds an Arnold material with the correct colour spaces, and drops the asset on the ground with an optional reference cube. Export writes your selected meshes and cameras back out to a valid, embeddable GLB. A built-in scene browser lets you pick, hide and show objects without leaving the tool — and a guided, gated flow walks you through every step, one material or one asset at a time.
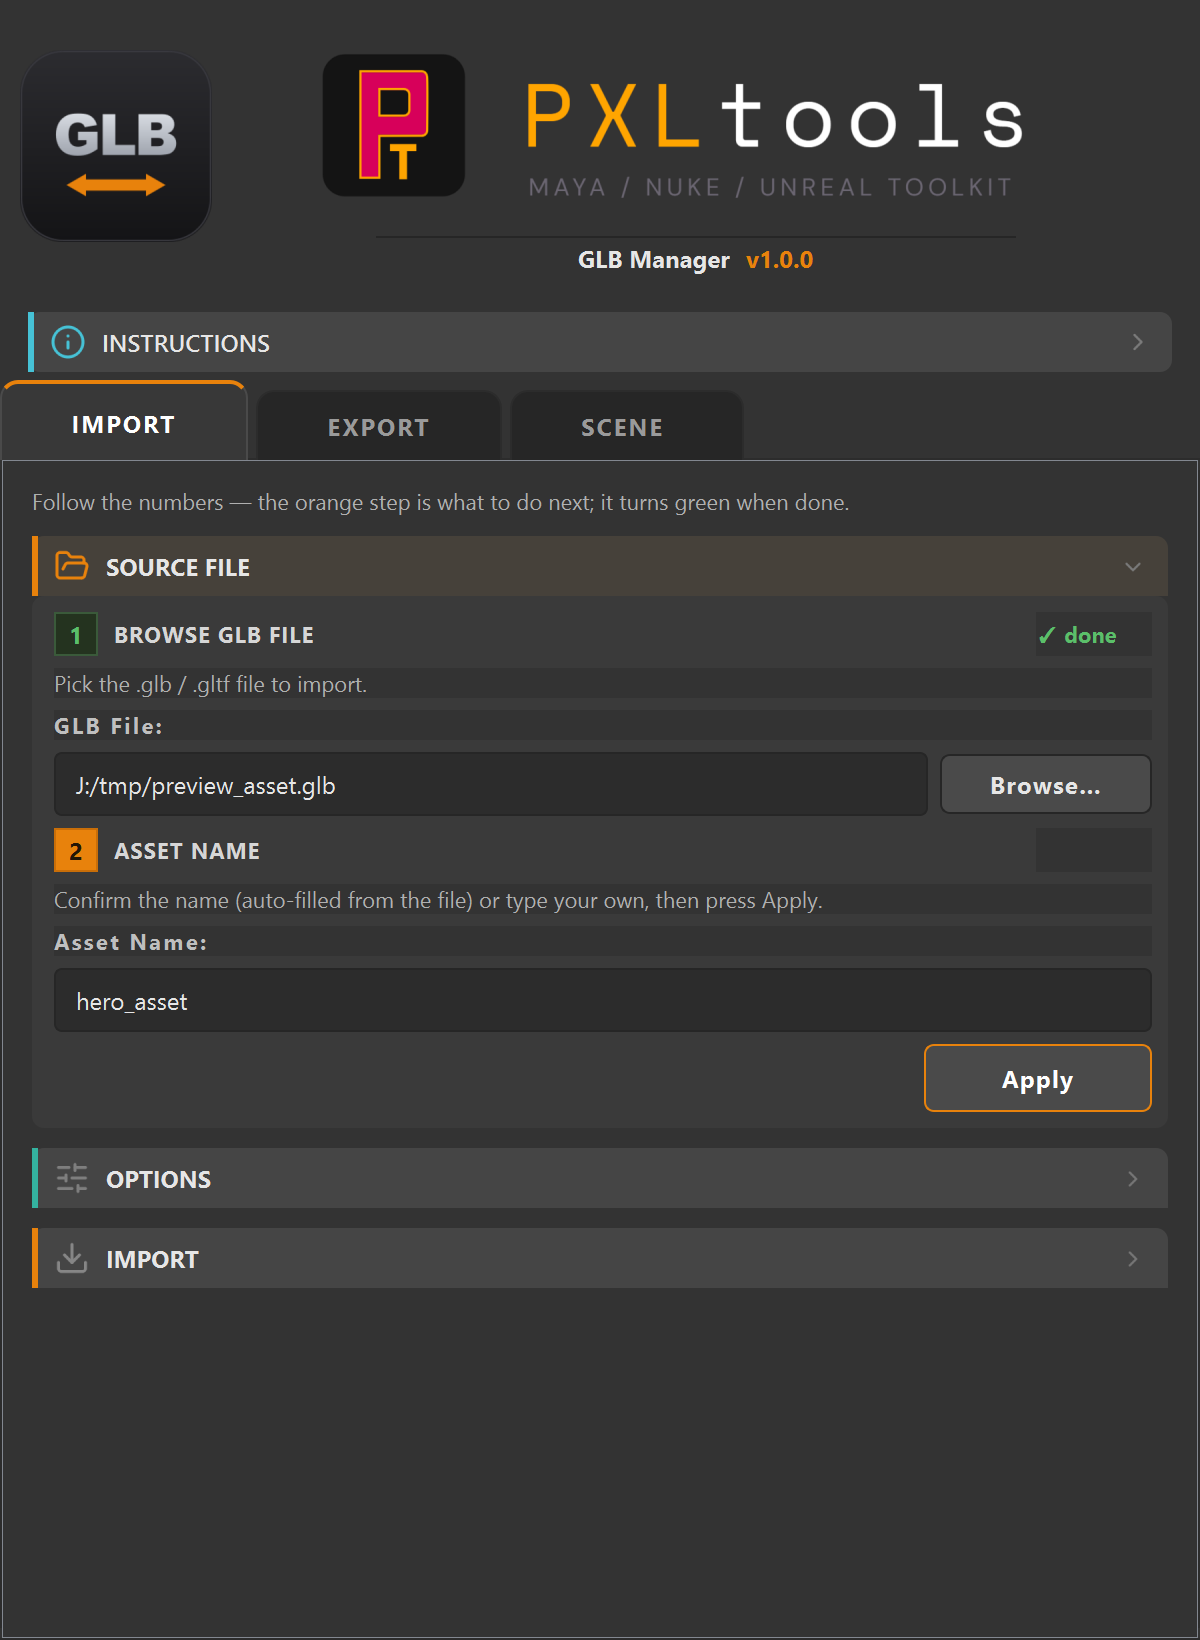
The interface
01
Overview
GLB Manager is a single, unified tool for working with GLB/glTF 3D assets inside Maya. On import it reads the geometry, pulls out the textures (diffuse, metallic, roughness, normal), builds an Arnold PBR material with the right colour spaces, and places the asset on the ground with an optional 1 metre reference cube.
On export it triangulates and writes your selected meshes — and optionally your cameras — back out to a valid, embeddable GLB. A built-in scene hierarchy browser lets you select, hide and show objects directly. The whole thing runs on a guided, gated flow: the orange step is what to do next, and it turns green when it is done. It shares the same UI kit as the rest of PXLtools and auto-updates automatically on launch.
02
Requirements
- Autodesk Maya 2025
- Arnold (mtoa) — optional; the tool falls back to lambert if Arnold is not loaded
- Pillow (PIL) — optional; required only for packing ORM channels on export
- Python 3
Tested on:
- Autodesk Maya 2025
Newer releases generally work, but these are the versions every release is actually tested against. If something behaves oddly on a newer host, that is worth reporting.
Network access
PXLtools needs outbound HTTPS (TCP 443) to www.pxlmentor.com and
objects.githubusercontent.com for licensing and updates. On a studio or corporate
machine, check this before you install — see
Troubleshooting.
Maya 2025 already includes PySide6. You do not install it, you do not pip anything, you do not touch your Python environment. Pillow is the only optional extra, and only if you want packed ORM textures.
03
Availability
GLB Manager is free on the PXLmentor store. Claim it there and you are emailed your licence key and a single INSTALL.py: drag that file into a Maya viewport (or paste the one line from the email into Nuke's Script Editor) and the toolkit installs itself, this tool included. Get it free on the store.
04
Using the GLB Manager
The tool has three tabs: IMPORT, EXPORT and SCENE. Each tab is a numbered, gated flow.
The step-gating flow
Every numbered step is gated. This is the part worth understanding once before you start.
Step states at a glance
Green — done
This step has already been satisfied. No action needed.
Orange — do this now
The one enabled step. Complete it, and the next step wakes up.
Grey — locked
Intentionally un-clickable until it is its turn. Finish the orange step first.
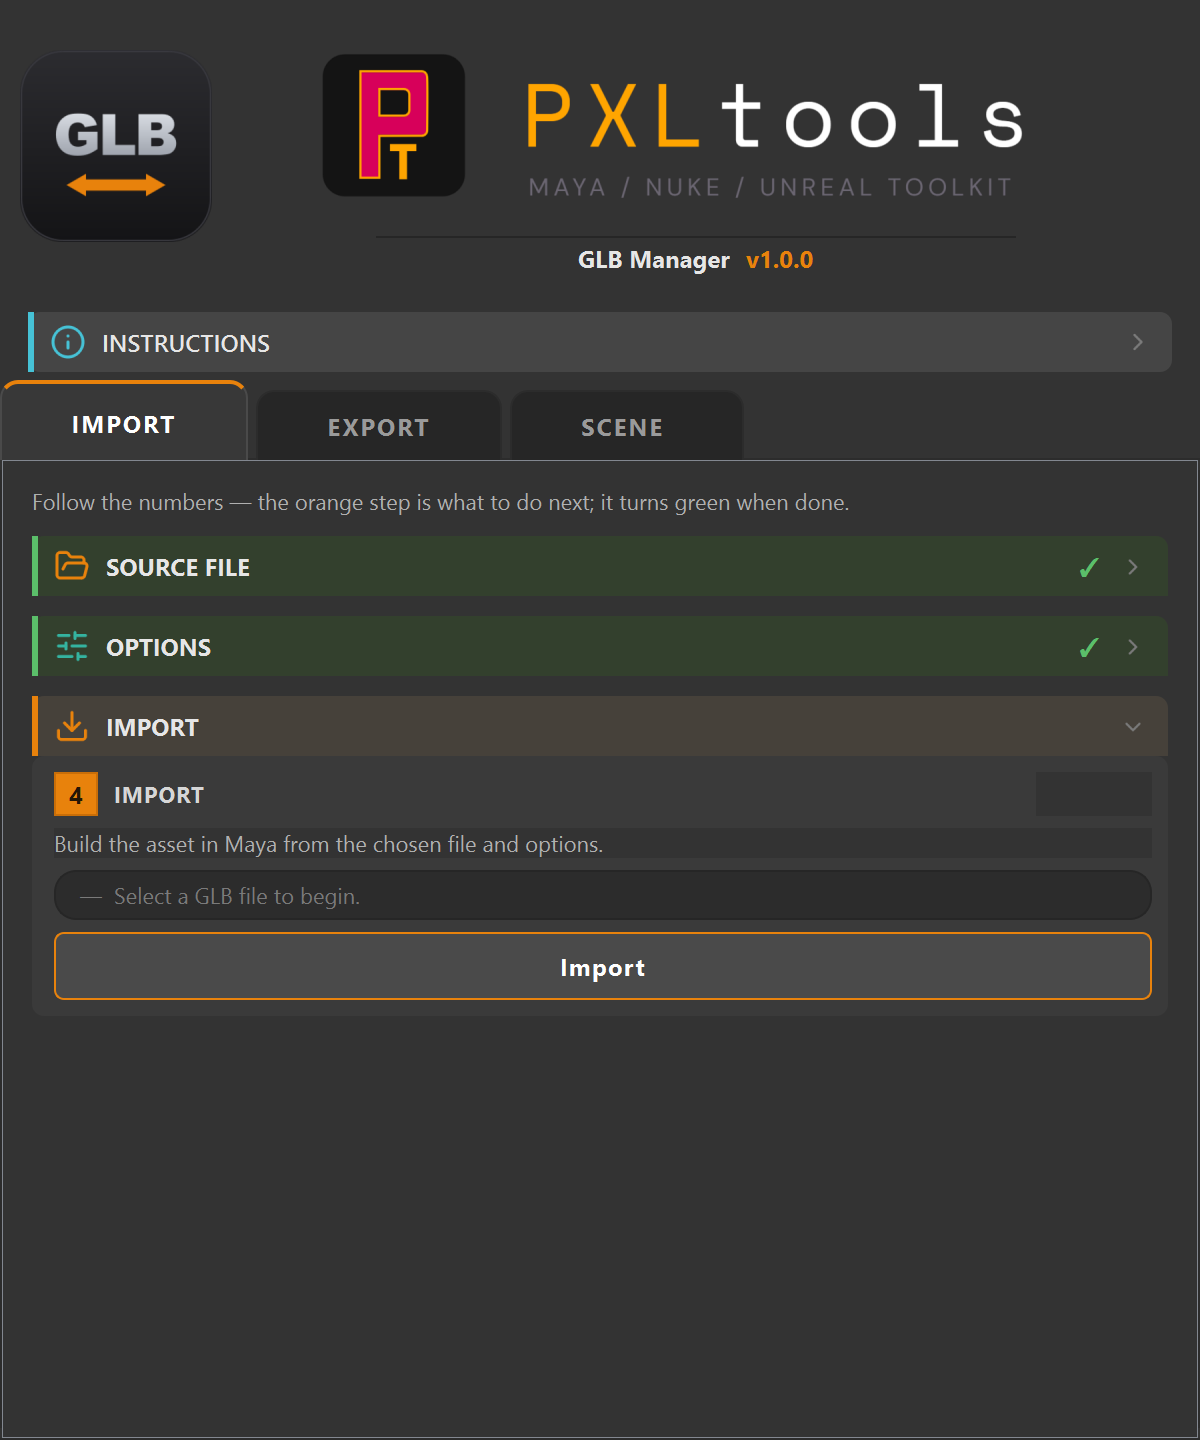
A completed section collapses with a green tick and the next one opens. You can always click a section header to reopen it and change a setting — editing an earlier step re-locks the later ones so they get re-confirmed.
IMPORT tab
Bring a GLB/glTF file into Maya in four steps.
- Browse GLB file. Pick the
.glb/.gltffile to import. - Asset name. Confirm the name (auto-filled from the file) or type your own, then press Apply.
- Output folder & options. Choose where extracted textures are saved, set the options — Import UVs, Extract Textures, Create Material, shader (aiStandardSurface / lambert), colour space (ACES 1.2 / Standard), and the optional 1 m reference cube — then press Use These Settings.
- Import. Build the asset in Maya. The progress bar tracks each stage; the status line turns green on success.
EXPORT tab
Write selected objects out to GLB in three steps.
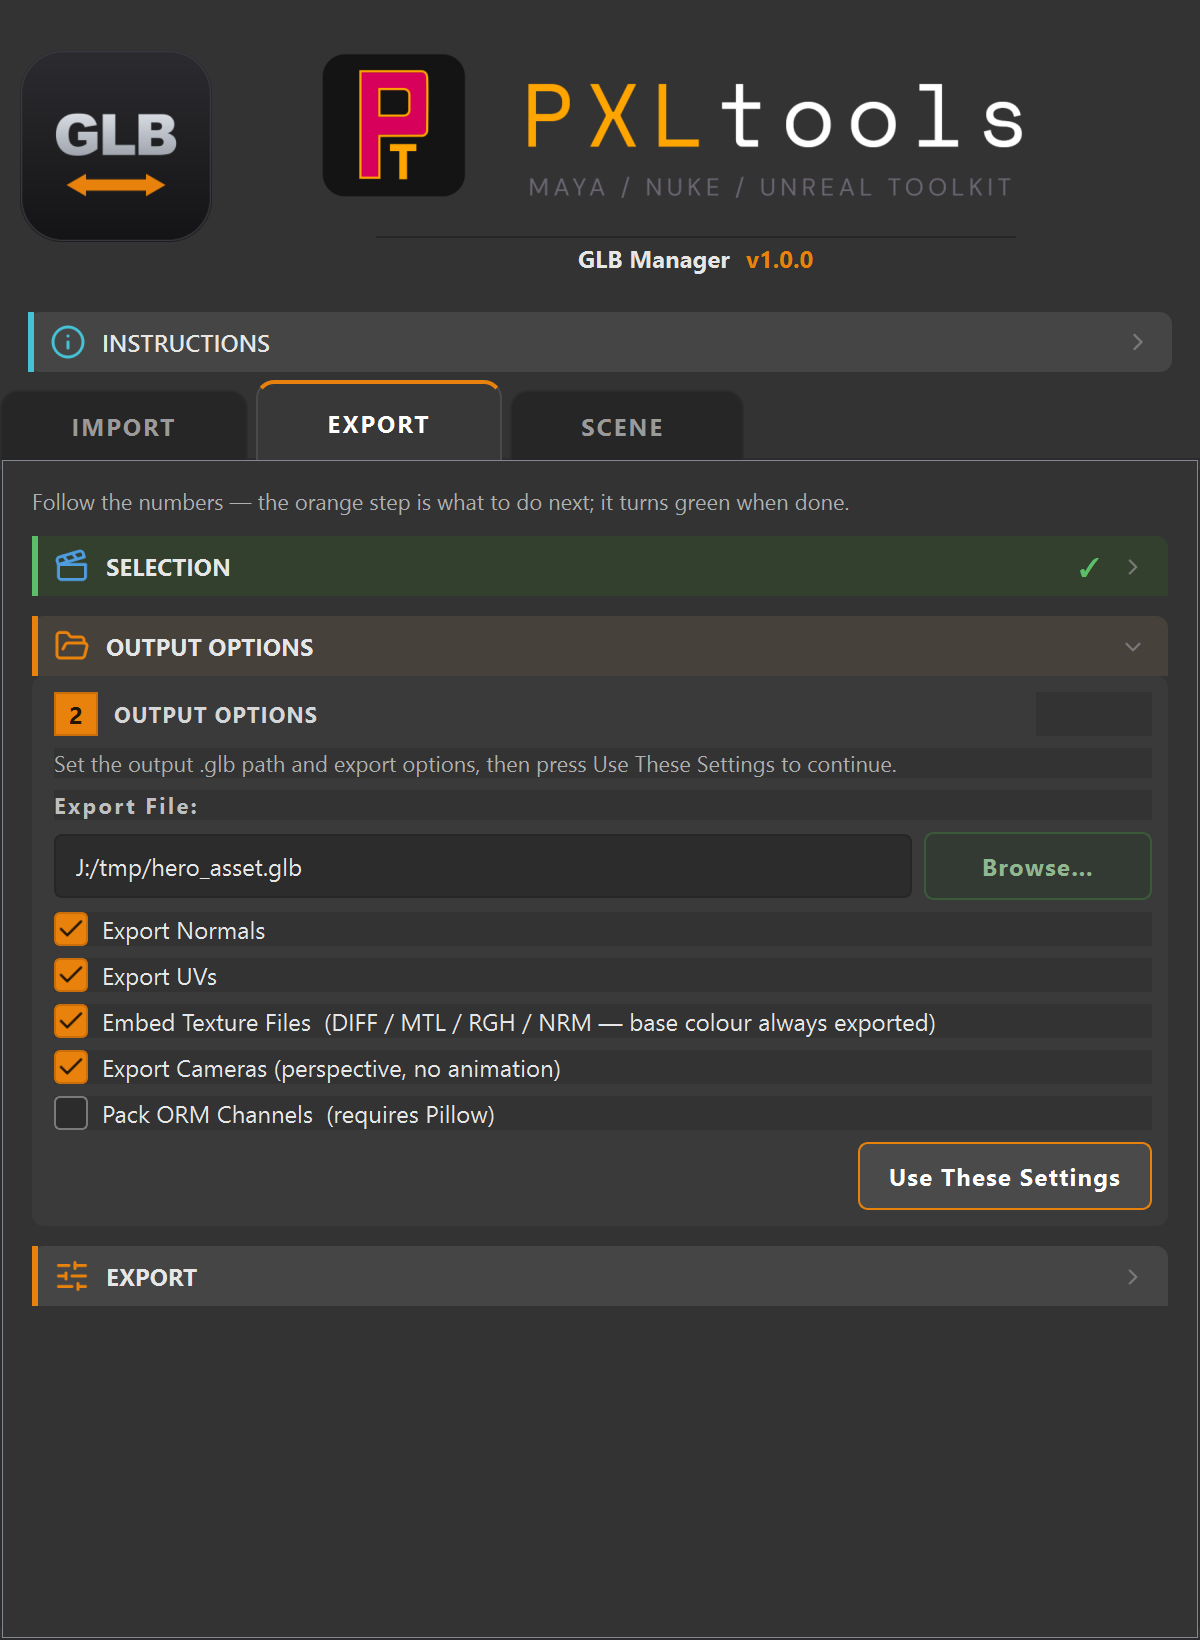
- Select objects. In the SCENE tab, select what you want, then press Use Scene Selection. Groups are auto-expanded on export.
- Output options. Set the output
.glbpath and the options — Export Normals, Export UVs, Embed Texture Files, Export Cameras (perspective, no animation), and Pack ORM Channels (requires Pillow) — then press Use These Settings. - Export. Write the file. The status line reports the item count, output path and file size on success.
SCENE tab
An indented hierarchy browser of your scene, tagged by type (MESH, CAM, GRP).
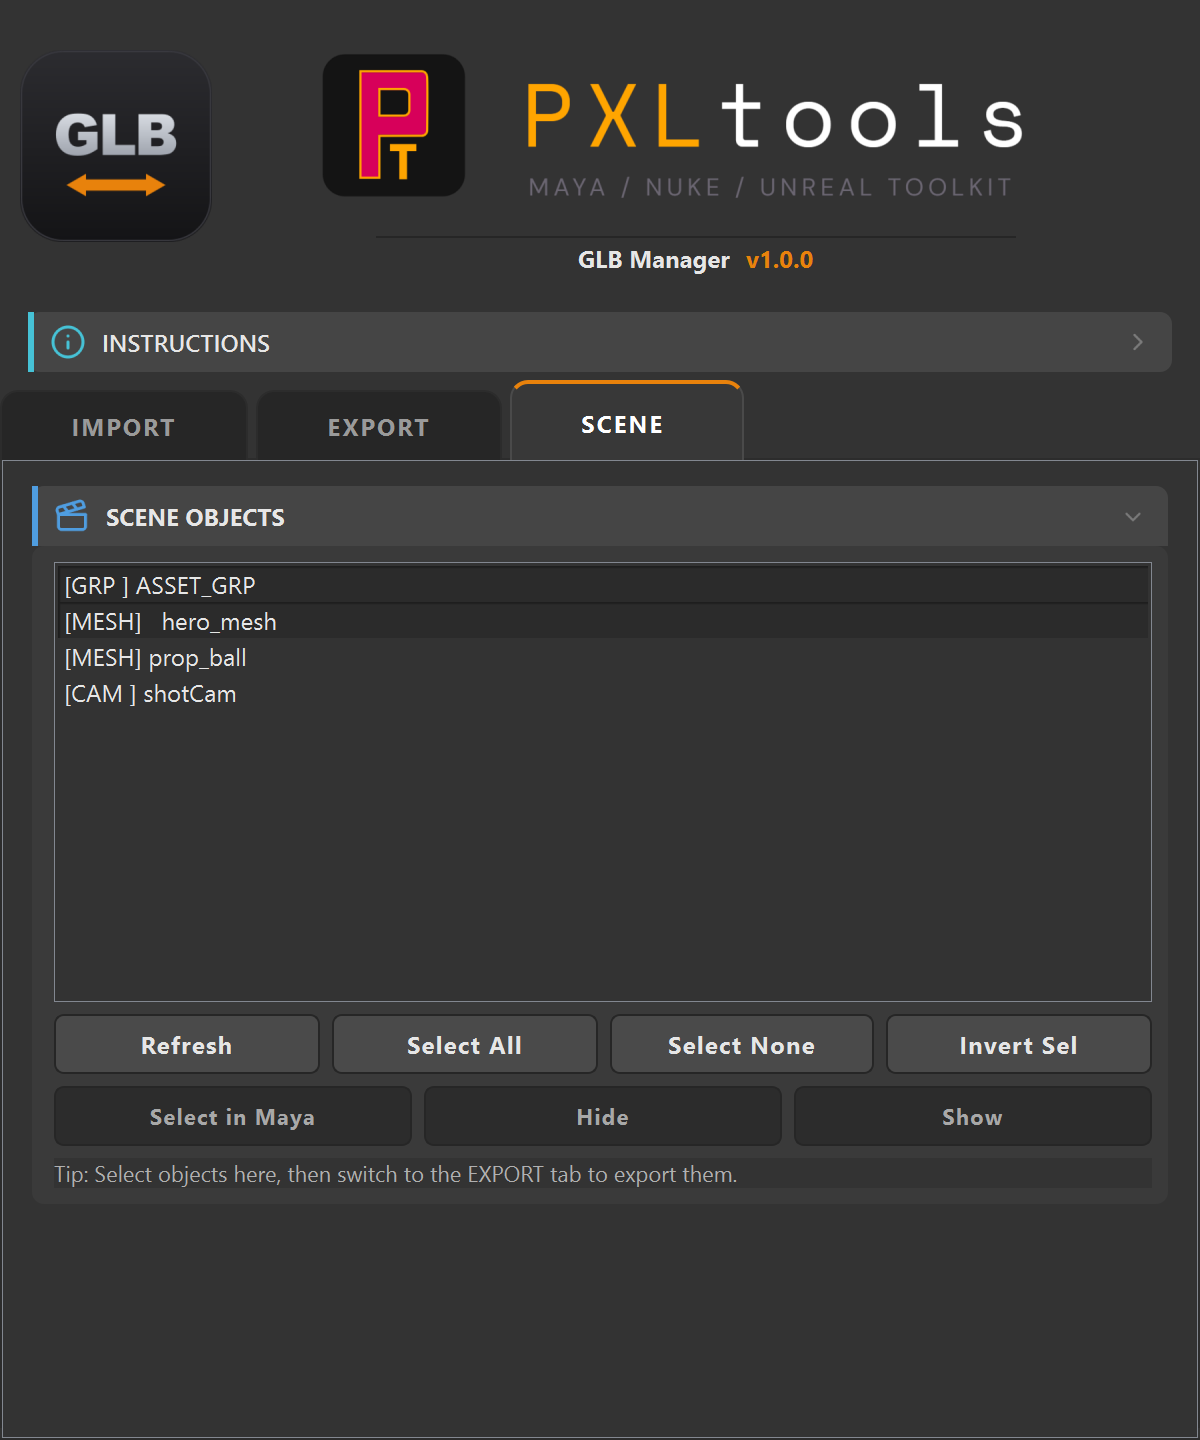
- Refresh / Select All / Select None / Invert Sel. Manage the list.
- Select in Maya / Hide / Show. Act on the live Maya scene from the list.
Tip: Select your objects in the SCENE tab first, then switch to EXPORT and press Use Scene Selection — the selection carries straight over.
05
Troubleshooting
The install fails, or the tool says it cannot reach pxlmentor.com.
This is a firewall almost every time, not a broken installer — and it is very common on studio and corporate machines. PXLtools needs outbound HTTPS on TCP 443 to two hosts:
Send this to your IT team
www.pxlmentor.com  (TCP 443) — licence checks, update checks, downloads
objects.githubusercontent.com  (TCP 443) — the actual file download
Both hosts, not just the first. The download is handed off to a signed link on
objects.githubusercontent.com, so a rule that allows pxlmentor.com but
blocks the second host lets the version check succeed and then fails the download.
A certificate error instead means your network is inspecting HTTPS traffic (Zscaler, Netskope, a corporate SSL appliance) — that needs an SSL-inspection exception for those hosts, not a port opening.
The installer writes full details to ~/Documents/PXLtools/install_failure.log. Email it to
support@pxlmentor.com
and I will tell you which case it is. If your IT will not budge, ask for the offline package.
A button is greyed out and I cannot click it.
That is the step-gating doing its job. The grey steps are intentionally locked. Find the orange step — that is your current action. Completing it unlocks the next one.
Pack ORM Channels has no effect.
ORM packing needs Pillow (PIL). If it is not installed, the metallic/roughness maps are written separately instead. Install Pillow, or leave Pack ORM Channels unchecked.
My material came in as lambert, not aiStandardSurface.
The Arnold (mtoa) plugin was not loaded, so the tool fell back to lambert. Load Arnold before importing if you want a full PBR material.
The Scene tab does not show my new objects.
The list is a snapshot. Press Refresh in the SCENE tab after adding or deleting objects in Maya to re-sync it.
Export failed with a duplicate-name error.
Maya cannot resolve two objects with the same short name. Rename the duplicates (the Advanced Batch Renamer is handy), then Refresh the Scene tab and try again.